OK - perhaps my gauge may have been a wee bit off - I made the mistake of checking my gauge over ribbing instead of the stockinette that the pattern suggests. When looking at the schematic, the width of the back hem was supposed to be 63.5cm. I was getting 76 cm. Oops.
After some deliberation (and a rather blunt intervention by the wise and knowledgeable Kerrilyn "Are you knitting a throw?"), I knew that I had to start over. I liked the fabric that I got with the US 10.5 needles and I didn't want to knit any tighter than that. So I fudged things a bit as I am wont to do.
Modifications:
1. I cast on 96 stitches and did not do the increases after the ribbing. I did this because it gave me a sleeker silhouette and also made figuring out the ribbing much easier. The ribbing is designed to look as though the cables are flowing into it. Resulting width was 55 cm/22 inches.
2. I turned the midclavicular zigzags into just plain stockinette. I wanted to highlight the cables and the zigzags just looked too busy to me. Also since I needed to lose 12 stitches to get my desired width, I simply took these stitches out of the zigzag panels
3. I knit the sleeves in the round. I considered knitting the body in the round but in the end decided to knit the front and the back separately and seam them up before I picked up stitches for the sleeves. Like the body, I turned the zigzag panels into plain stockinette and decreased by 5 stitches per panel.
Wow, kudos to you if you're still with me. That's a lot of prose without any pictures. So here are some pictures (and modeled too):

I performed an experiment on the sleeves. The one on the Yarn Widower's right is a straight sleeve with no cap. In other words, the top of the sleeve is one straight line. This is how the pattern is written but I didn't like the bunching in the armpit.
The sleeve on the Yarn Widower's left has a rounded shoulder cap. I did this by picking up the central 10 stitches, knitting a row and then picking up a few more stitches on the end of each subsequent row until I had traveled the circumference of the sleeve and was ready to join. The end result - a smoother line at the armpit.
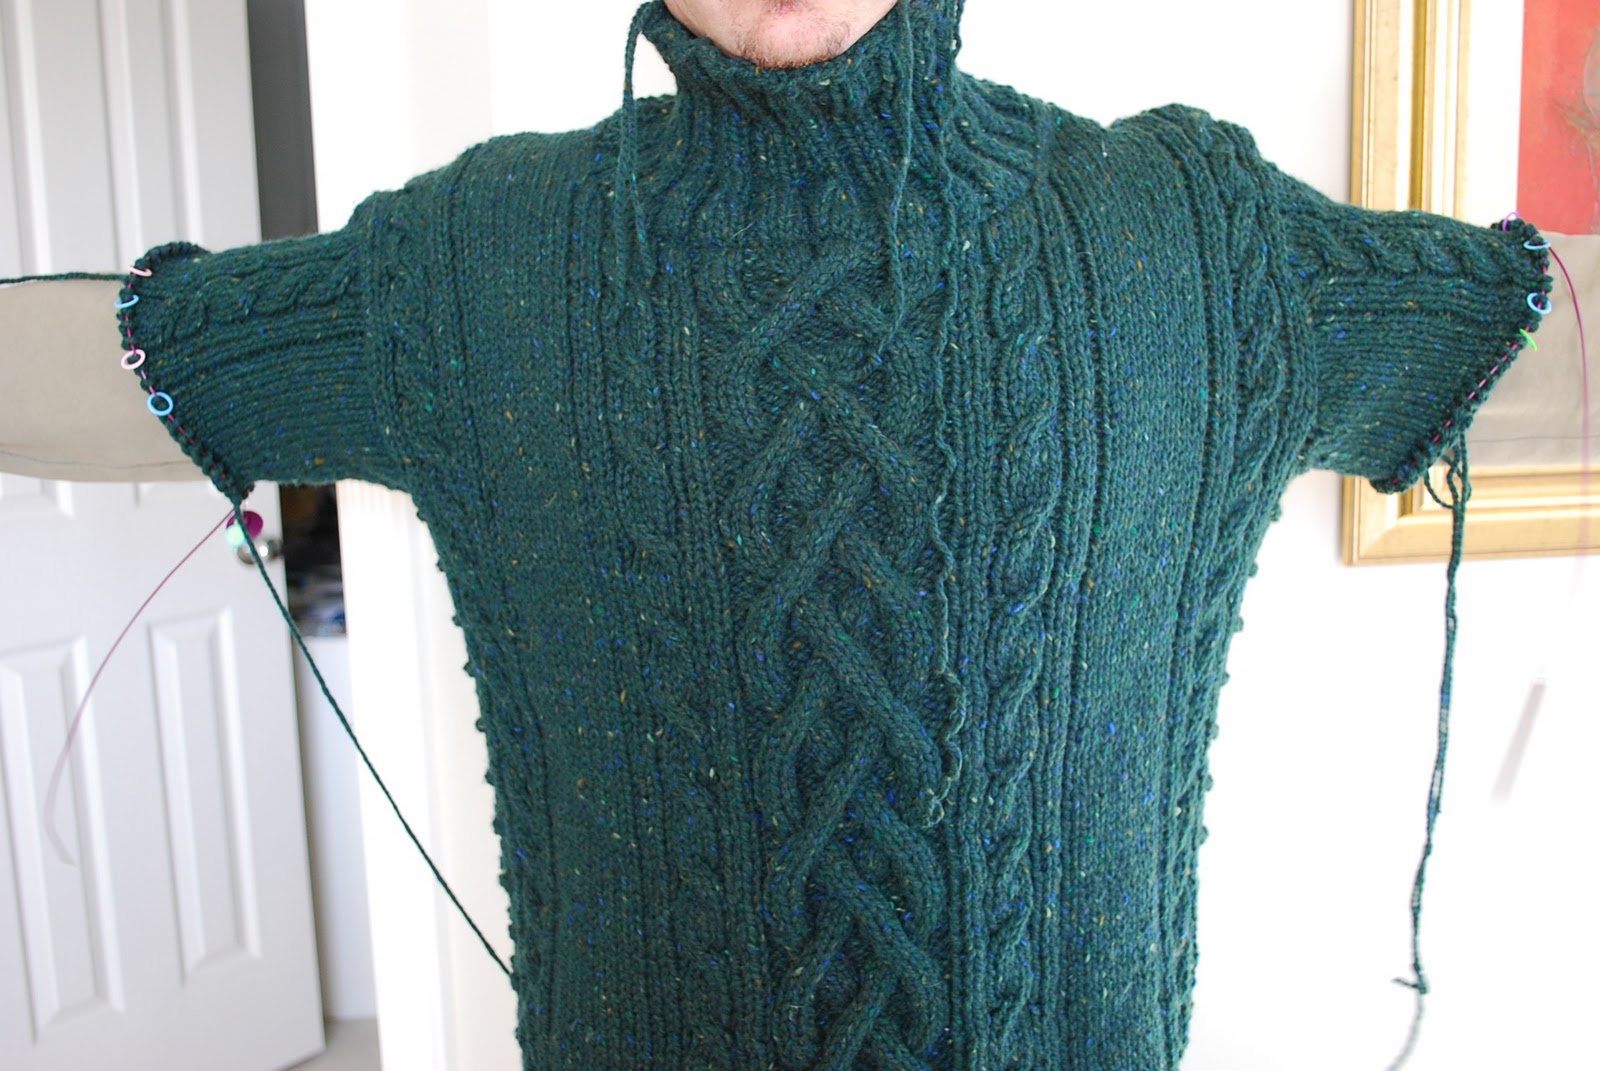
The one drawback being that the top of the shoulder draws up slightly when the arms are raised.
Which one did I choose? Find out in the next installment...
my vote is for the cap sleeve!! I'd rather have it bunch when I occasionally raise my arm then walking around with my sweater bunched up in my armpits.
ReplyDeleteYou've done an amazing job!!! You ARE a guru!!!
Aw shucks. Now you're just making me blush.
ReplyDeletethis is exciting, it must be hard to get the YW to take that sweater off so that you can get back to work--
ReplyDelete